To grant access to new users first go to MyNubity and log in with an account previously created. Then click on Account at the top right of the site and go to MyTeam, after that the next screen will be displayed:
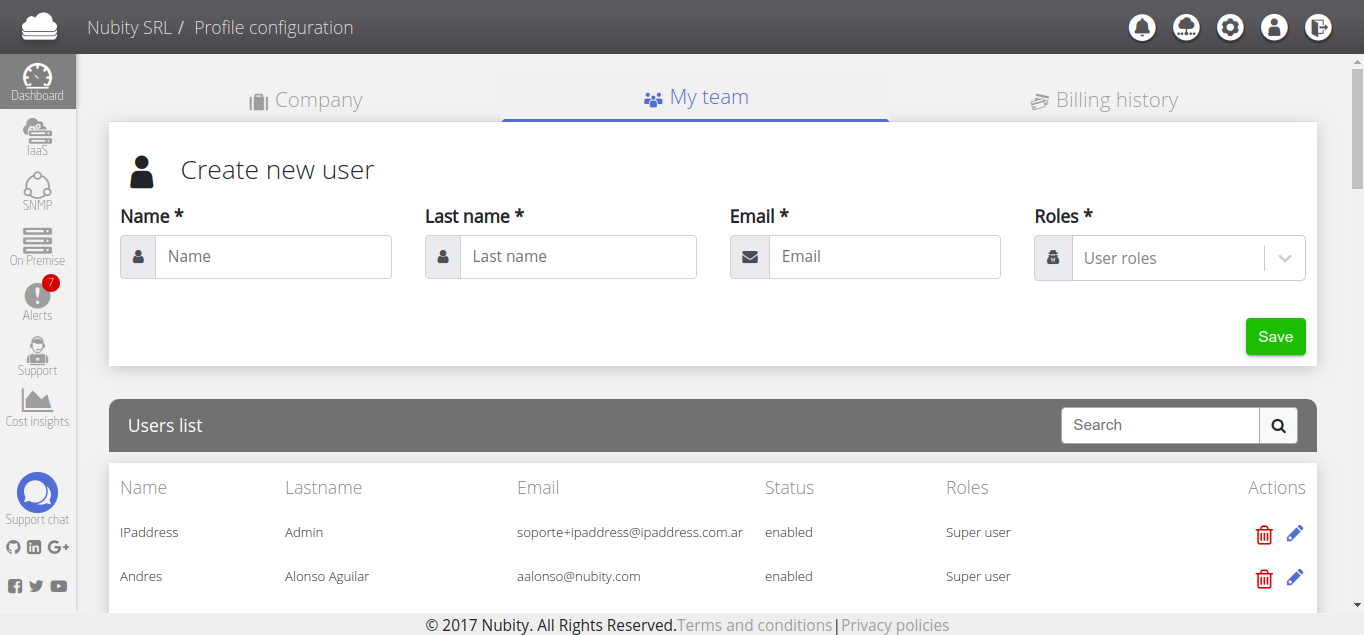
Here you will find a list with all the users who are already part of the company and also the section Create New User. To create a new user the following data is required:
Name: User name.
Last Name: User last name.
Email: User email.
Role: Role assigned to the new user (You can go to Roles to extra details about Role).
Enter this Data and then click on Save. After that check the email previously registered. You will recieve a Welcome message and the Activation Link. Click on the link to activate the new account. After that another screen will be displayed and there you must generate a new password. After create the password you’ll automatically log into MyNubity.
Nubity allows users to belong to more than one account. If you belong to another company create a new password doesn’t be necessary. You can use the password previously generated.
In Myteam you also can find the Users List. This list contains all registered users in the company. Someone with Super User privileges can edit this information and delete other users, to do this go to Actions at the right side of the screen, as shown in the following image:
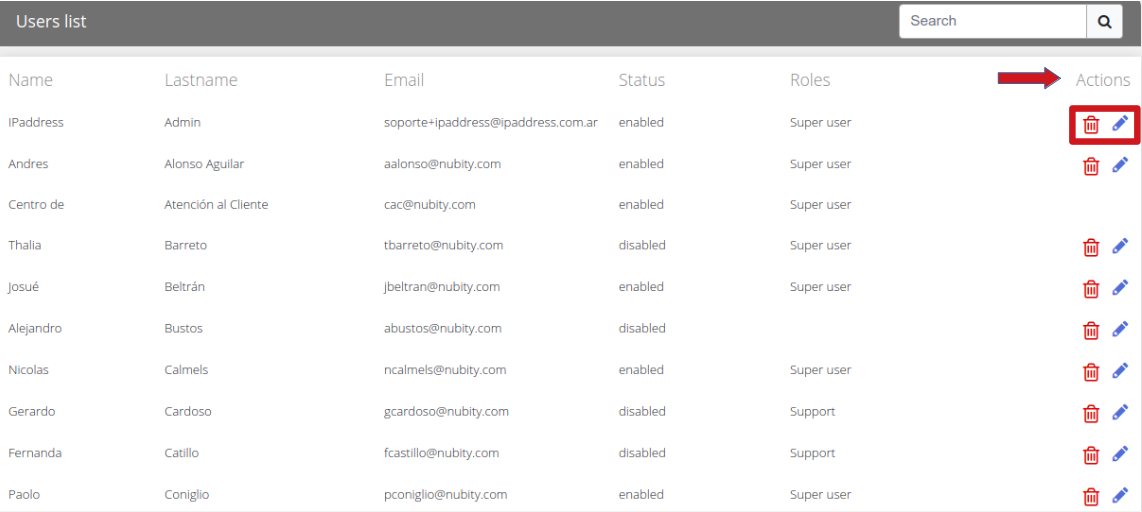
Here you can find two icons, Edit and Delete. The blue icon corresponds to Edit user, click on it and the next screen will be displayed:
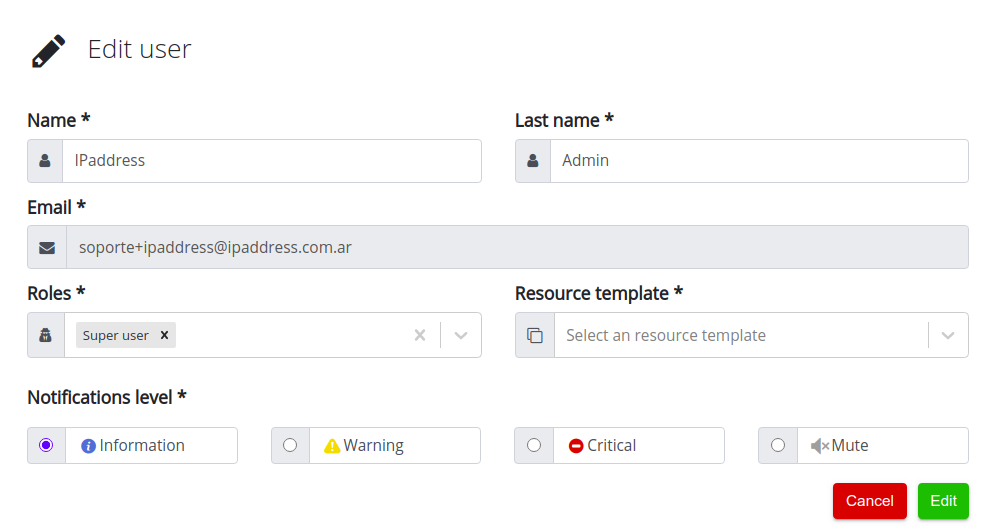
Here you can modify the following Data:
Name: User name.
Last Name: User last name.
Email: User email.
Roles: Role assigned to the user.
Resource Template: Here you can select a resource template in case you have it.
Notification Level: Alert level notification.
Once the changes were made, click on the Edit button to save changes. To extra details about this Data you can go to the article User Profile.
The red icon corresponds to Delete user. Click on it if you wan to delete a particular user and the next screen will be displayed:
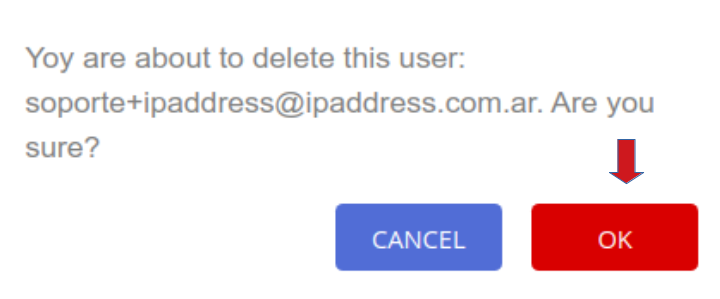
Then click on Ok in the confirmation message to complete this process.